Trellis setup
A trellis chart (i.e., small multiple) repeats the same graph for multiple sub-categories to break the data into smaller pieces. When a standard trellis is on, the widget shows an array of small graphs; each graph shows data for a member of the 1st By (e.g., each region). The data is then broken down according to the 2nd By (e.g., brands in each region).
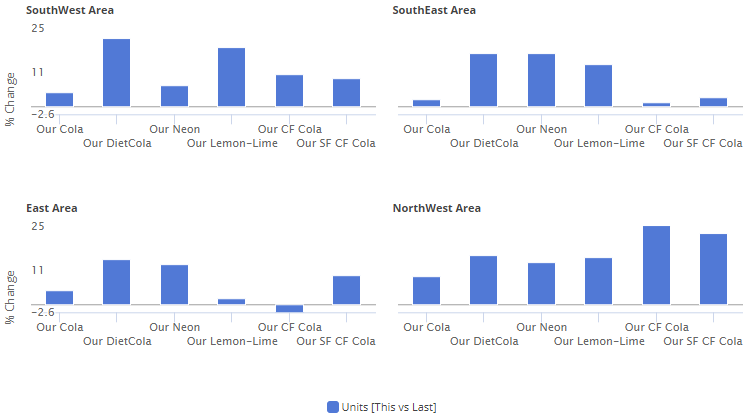
Depending on the level of expansion, the small graphs may be broken down further (e.g., brand/package combinations in each region).
A measure trellis is also available.
|
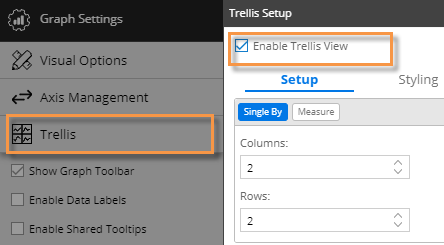
To set up a trellis |
|
|
|
|
|
|
|
-
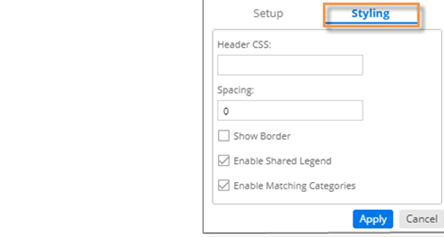
Leave the Enable Shared Legend box checked to share the legend between small graphs. In general, this is recommended.
-
Check or clear the Enable Matching Categories box.
Enable Matching Categories on
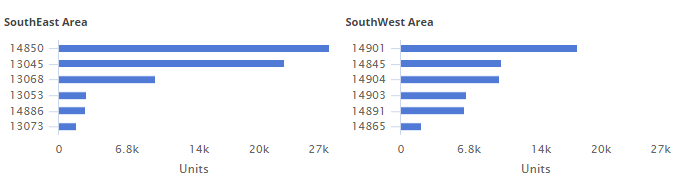
To order subgroupings consistently in the small graphs (i.e., same order in graph 1 as graph 2, graph 3, etc.), check the Enable Matching Categories box. In general, this option is recommended if the small graphs have most subgroupings in common because it allows for easier comparison and synchronous scrolling. For example: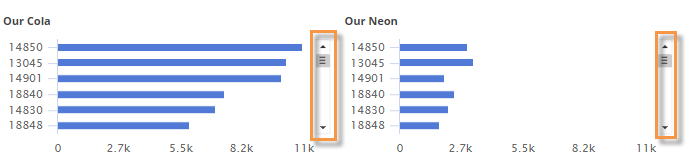
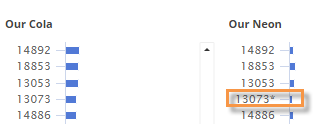
Note that each small graph returns data for the top members for that category up to the graph page size (e.g., up to 50 zip codes for each brand). The top members are based on the sort order. When "matching categories" is on, the trellis creates a combined list of members returned by all small graphs and displays it in all graphs. For example, the combined list might include 45 zip codes that are common to all brands plus 15 zip codes that are unique to one or more brands. Members may be in the top results in some graphs but not others (e.g., zip code 13073 is in top results for graph 1 but not graph 2); however, they will still appear in the combined list. The trellis uses an asterisk (*) to indicate that a member is not in the top results for that particular small graph but is included because it is in the combined list. If you wish, you can change the graph page size in graph settings to accommodate more members.
Enable Matching Categories off
If small graphs do not have common subgroupings, you should generally turn off the Enable Matching Categories option. This will allow each small graph to sort and size its subgroupings independently.
 Note that matching categories is disabled in the following situations: two or more levels of auto-expansion (i.e., 1st By and 2nd By auto-expanded) or key-level as the 2nd By.
-
Click Apply.
|
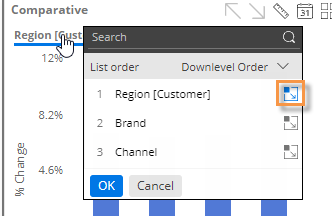
Tip: To enable drilling through a series of trellis graphs, every other level should be expanded; otherwise, users will need to manually turn on auto-expand after drilling. |
|
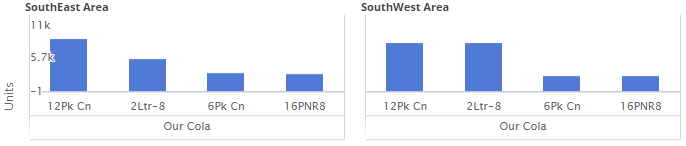
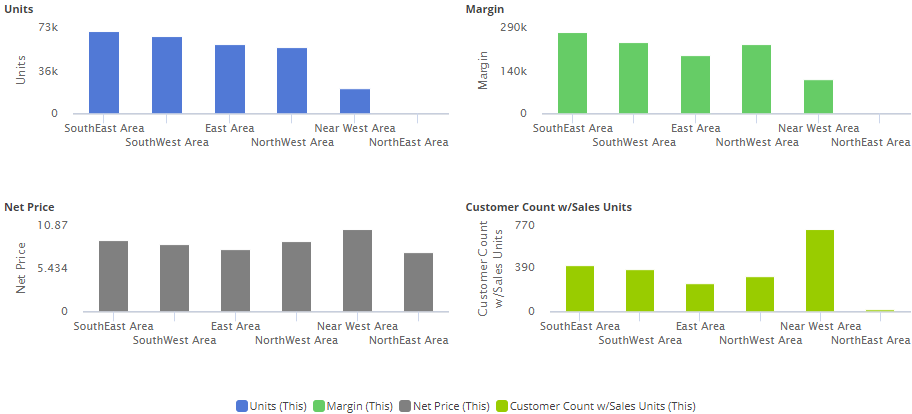
A trellis can show a small graph for each measure rather than each sub-category. In this case, all graphs break down data according to the top-level dimension (and additional levels if auto-expand is on). A measure trellis may be useful when comparing several measures across a dimension.
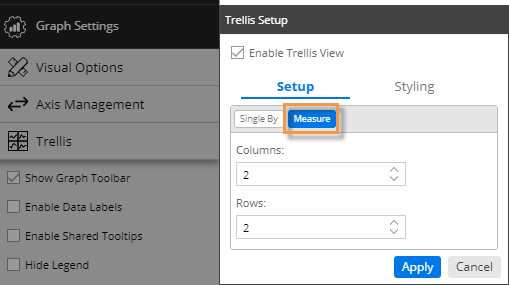
To set up a measure trellis
-
Add the measures to the comparative widget in the order you want them to appear.
-
Set up a trellis as previous explained except choose the Measure option in the Trellis Setup area.