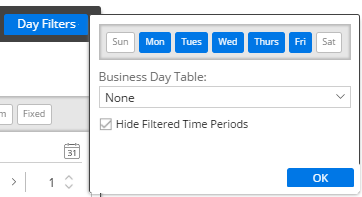
Day filters
By default, the selected date range includes all days between the start date and the end date. For example, if you are looking at the month of March, the results include data for all days (Sundays through Saturdays) in March. When you select the dates, you can turn on day filters to focus on certain days-of-the-week or business days and filter out data for all other days.
|
To use day filters |
|
|
 |
 in the title bar of the widget or clicking on Date Range under context in the toolkit.
Tip: When a day filter is selected, the view only includes data for the selected days. For transactional data, this means that the results will only include records that occurred on the selected days. If the dataset includes non-transactional data, you should also understand how day filters affect non-transactional data.