Date setup
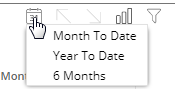
If the widget has a date setup icon  in its title bar, you can change its date range, including the resolution, number of dates, comparison date range, etc.
|
To select the date setup |
|
|
|


|
Option |
Explanation |
|
Resolution (i.e. days, weeks, months, or customized periods, etc.) |
Choose the units of time from the menu at the top of the dialog. This selection controls which date presets will be available. From the Week Ending drop-down menu, choose a week ending day. |
|
Main date range (This) |
Under This, click the button of the date range to view (e.g. Month To Date). The available date presets depend on the resolution selected above and the dataset configuration. For example, you might choose to see the month-to-date, last month (i.e. most recent complete month), or year to date. By default, most date ranges update automatically as time goes on; however, a fixed date option is also available. When you choose a date preset, the start date, end date, and other options populate automatically. If you wish, you can customize the date range further after making your selection.
|
|
Day filters (optional) |
Optionally, click the Day Filters button at the top of the dialog to choose specific days of the week or business days within the date range to analyze. Data for all other dates will be filtered out. |
|
Comparison date range (Last) |
Under Last, click the button of the previous date range (e.g., YAG). The available options depend on the resolution selected above. For example, you might choose the timeframe immediately prior. When you choose a preset, the start date, end date, and other options populate automatically. You can further customize the date range after making your selection.
If the dialog does not include a Last section, click Tip: A comparison date range is optional in many widget types. If you want to look at a single date range only, you can remove the Last date range.
|
|
Comparison for incomplete timeframes
|
A Comparison option at the bottom of the dialog controls the selection of the previous (Last) date range when This date range is incomplete.
|
|
Linked dates (i.e., use dashboard date) |
Toggle the link icon at the bottom of the dialog to link or unlink the widget's date range, depending on whether you want the date range to update with the dashboard date.
|


 - indicates that the widget's date will update when the dashboard date changes. In view mode, the date ranges of all linked widgets update simultaneously when one of them is changed.
 - indicates that the widget's date range is unlinked and, therefore, has its own stand-alone date range.
|
Tips: |
|
|
In view mode, you can click the |
|
|
Multi Comparative widgets can show additional date ranges besides the standard This and Last ranges (e.g., MTD vs. YAG and YTD vs. YAG). To edit a date range for a Multi Comparative, click Multi Comparative date ranges cannot be linked to other widgets. |
|
 button to revert the date range back to the last saved settings.