Custom calculations for columns

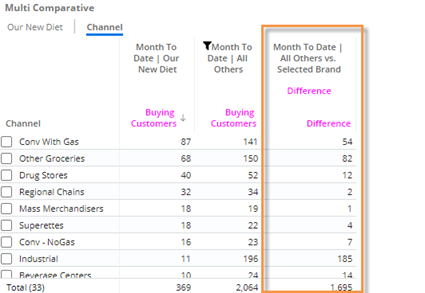
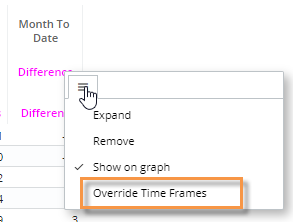
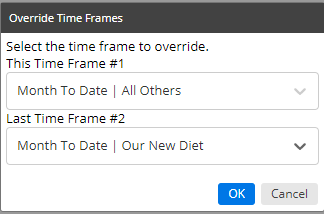
In Multi Comparative columns, you can override the formula of a temporal measure to apply special calculations—such as difference in volume for one sales rep versus another or number of customers buying one package versus all other packages—based on columns rather than specific timeframes (This/Last). This feature requires that the dataset has temporal measures that can be overridden to show the desired information. 

To apply custom calculations to a Multi Comparative column

  1. Add or select a Multi Comparative widget. The widget should be in grid format.

  2. Set up individually filtered columns and/or benchmark columns for the date ranges and members you wish to include in the custom calculations.

  3. Add a temporal measure in its own column or a subcolumn. Its formula should correspond to the information you want to show. In the measure's formula, "#1" indicates the first timeframe (This) and "#2" indicates the second timeframe (Last). You will be able to swap out these timeframes with specific columns in the following steps. For example, to show difference in Buying Customers for two different columns, the temporal measure should calculate difference in Buying Customers for two timeframes.

Tip: To see a measure's formula, add it and then place your cursor over its name in the heading.

  1. Place your cursor over the temporal measure heading and click the  menu icon.

  2. Select Override Time Frames.

  1. In the first menu, select the column to substitute for the #1 timeframe in the formula (e.g., Month to Date | All Others).

  2. In the second menu, select the column to substitute for the #2 timeframe in the formula (e.g., Month to Date | Our New Diet).

  3. Click OK.

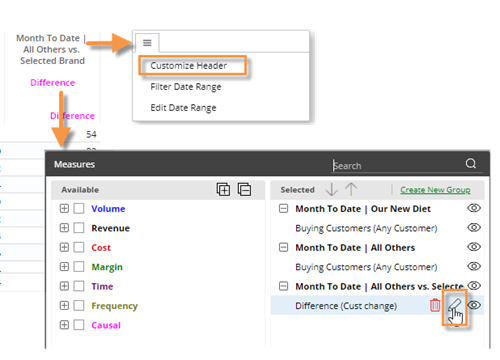
  1. (Optional) Customize the column headers to indicate what the column shows:

    To customize the main heading:
    - Place the cursor over the column and click the  menu icon.
    - Select Customize Header.
    Choose header options.

    To customize the subheading (i.e., measure name):
    - Go to the measures area.
    - Place your cursor over the measure name in the right pane.
    - Click the  icon.
    - Enter a display name.