|
To create a widget filter
|
-
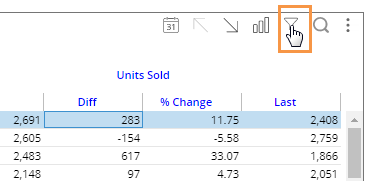
Click the filter button at the top of the widget (visible on mouseover if enabled).
|
|
-
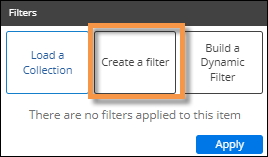
In the pop-up dialog, click Create a Filter.
Other options may be available:
• Checked - If the widget has checked members, you can filter on them.
• Load a Collection - You can filter on a saved collection of members.
• Build a Dynamic Filter - You can filter based on test criteria.
|
|
-
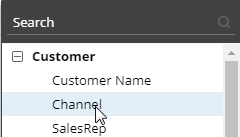
Select the dimension (i.e., attribute) for which to create a filter.
If you do not see the dimension listed (in view mode): Check the Show All box to access dimensions besides those that were built into the widget.
|

|
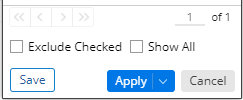
-
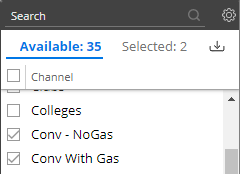
Checkmark the desired member(s).
Tips:
• By default, the filter choices only include members with data in the current context. If you wish, you can check Show All to list all members.
• The Exclude Checked option lets you show data for all members except the selected members.
• You can import a file to quickly select members. Click  at the top of the selection window to access this option. at the top of the selection window to access this option.
• You can optionally click Save to create a collection of the checked members so that they can be reused later.
|
|
-
Click Apply to apply the filter to the selected widget only.
If you prefer, you can apply the filter to all widgets in the dashboard by clicking the drop-down menu and selecting Apply to Workspace.
|
|
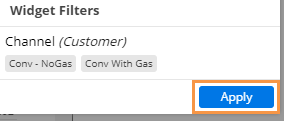
-
Click Apply again in the filters area.
|
|